
Are you noticing uneven watering or leaks in your garden? Your Rain Bird sprinkler head might need a quick replacement.
Fixing it yourself is easier than you think and can save you time and money. In this guide, you’ll learn simple, step-by-step instructions to replace your Rain Bird sprinkler head fast and hassle-free. Keep reading to get your lawn back to perfect watering in no time!
Credit: www.youtube.com
Tools And Materials Needed
Essential toolsfor replacing a Rain Bird sprinkler head include a shovelto dig around the sprinkler, a pair of pliersto grip and twist parts, and a screwdriverfor removing any screws. A replacement sprinkler headis necessary, along with pipe tapeto seal connections. Having a bucketor container nearby helps hold removed parts.
Choosing the right replacement head depends on the sprinkler system typeand watering needs. Check the spray patternand radiusto match your existing setup. Heads come in options like fixed spray, rotor, or drip emitters. Consider the water pressureand flow ratefor best performance.
Credit: www.youtube.com
Preparing For Replacement
Before replacing a Rain Bird sprinkler head, it is important to shut off the water supply. This prevents water from spraying while you work. Locate the main water valve for the sprinkler system, often near the water meter or in a valve box in your yard.
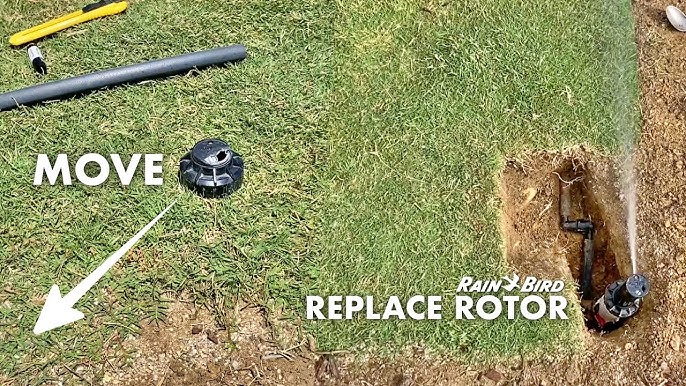
Next, find the sprinkler headthat needs replacement. Walk along the sprinkler line and look for the head that is broken or not working properly. It may be hidden under grass or dirt. Clear the area around it carefully to avoid damage.
Removing The Old Sprinkler Head
Start by turning off the water supply to the sprinkler system. Gently twist the old sprinkler headcounterclockwise to loosen it. Use a wrenchif it is tight, but do not force it too hard to avoid damage. Once loose, pull the head straight out.
Clear away any dirt or grass around the base of the sprinkler. This helps to see the pipe and prevents debris from entering. Use a small brush or cloth to clean the area thoroughly. Keeping the area clean makes installing the new head easier and ensures a good fit.
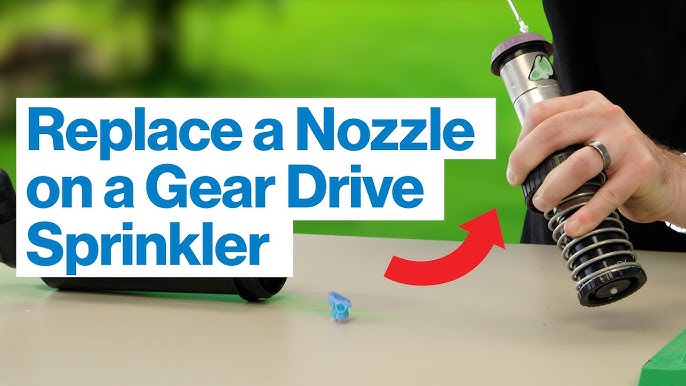
Installing The New Sprinkler Head
Place the new sprinkler head into the riser carefully. Make sure it sits straight and at the right height. A crooked sprinkler head can cause uneven watering. Align the sprinkler head so it sprays water in the desired direction. Check that it is not blocked by plants or other objects.
Hold the sprinkler head firmly. Turn the collar clockwise to tighten it on the riser. Do not over-tighten; this could damage the threads. Use a wrench if needed, but be gentle. Adjust the spray pattern by turning the top of the sprinkler head. Test the spray to ensure good coverage and proper distance.
Testing The New Sprinkler Head
Turn on the water slowly. Watch the sprinkler head carefully. Ensure the water flows smoothly. Adjust the sprinkler if needed. Make sure it sprays evenly across the yard. Keep an eye on the pressure. It should not be too high or too low. Proper pressure is essential.
Inspect around the base of the sprinkler. Look for any leaks. Leaks waste water. Fix them quickly. Observe the spray pattern. It should cover the area evenly. No dry spots should be visible. Adjust the sprinkler for better coverage. Test it several times to be sure.
Maintenance Tips
Check your sprinkler heads often to keep them working well. Look for cracks, clogs, or damage. Clean any dirt or debris around the head. Make sure the water sprays evenly and covers the right area.
Before winter, drain your system to stop freezing damage. Remove or cover heads to protect them from frost. In spring, test the heads again for leaks or blockages. Replace any broken parts before the watering season starts.

Credit: www.youtube.com
Frequently Asked Questions
How Do I Remove A Rain Bird Sprinkler Head Safely?
Turn off the water first. Use a wrench to unscrew the old sprinkler head carefully.
What Tools Do I Need To Replace A Rain Bird Sprinkler Head?
You need a wrench, replacement head, Teflon tape, and possibly a shovel to dig.
How Do I Adjust The Spray Pattern On A New Sprinkler Head?
Use the adjustment screw on top. Turn it to set the spray distance and angle.
Conclusion
Replacing a Rain Bird sprinkler head is simple and quick. You just need the right tools and careful steps. Take your time to avoid leaks or damage. Check the water flow after installing the new head. Regular maintenance helps keep your lawn healthy and green.
Now, you can fix your sprinkler without calling a professional. Save money and enjoy a well-watered yard all season. Give it a try today!