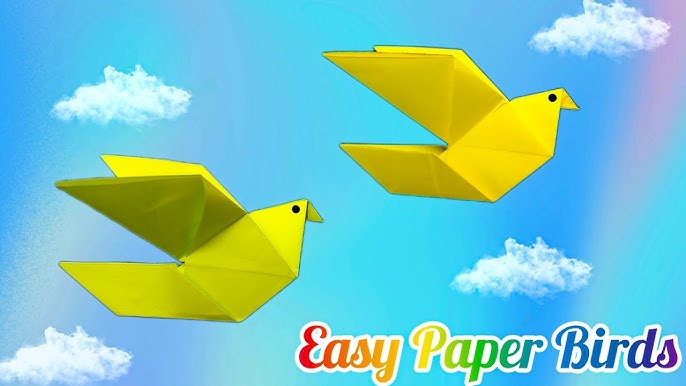
Have you ever wanted to create something beautiful with just a simple piece of paper? Making an origami flying bird is a fun and easy way to bring your creativity to life.
Imagine holding a delicate paper bird that looks like it could take flight at any moment. In this guide, you’ll learn step-by-step how to fold your own origami bird, even if you’ve never tried origami before. Ready to impress your friends and discover the magic of paper folding?
Let’s get started!

Credit: www.youtube.com
Materials Needed
To make an origami flying bird, you need a few simple materials. The most important is a square piece of paper. Use origami paper or any paper cut into a perfect square.
Choose paper that is thin but strong. This helps the bird fly better. Colors or patterns are your choice, but plain paper works well for beginners.
- Square origami paper (about 6 x 6 inches)
- Flat, clean surface for folding
- Optional: Bone folder or ruler to make sharp folds
Choosing The Right Paper
Choosing the right paper is importantfor making a perfect origami flying bird. The paper should be squareand easy to fold. Thin paper works best because it folds neatly and holds creases well. Avoid thick or very stiff paper, as it is hard to fold precisely.
Origami paper, also called kami, is designed for folding. It is lightweight and comes in many colors. You can also use regular printer paper cut into a square, but it may be thicker.
- Size:Start with 6×6 inch (15×15 cm) paper for easy folding.
- Color:Choose bright or patterned paper to make your bird look nice.
- Texture:Smooth paper folds better than rough paper.
Basic Origami Folds
The valley fold is a simple origami move. It creates a V-shaped crease in the paper. Fold the paper towards you. The edges meet in the center. This fold is common and easy to learn. Children often start with valley folds.
The mountain fold is the opposite of a valley fold. It forms an A-shaped crease. Fold the paper away from you. The edges rise like a mountain peak. This fold is used in many origami designs. It helps create structure and shape.
The squash fold is a bit tricky. Start with a mountain or valley fold. Open the paper slightly. Press down to flatten and reshape it. This fold creates depth and detail. It’s often used for bird wings. Practice helps perfect this fold.

Credit: www.youtube.com
Step-by-step Folding Guide
Begin with a square piece of paper. Fold it diagonally both ways. Crease well and unfold. Fold the paper in half horizontally and vertically. This creates the base shape for the bird. Make sure all folds are sharp for better shaping.
To shape the wings, fold the top layers from both sides toward the center crease. This forms two triangles meeting in the middle. Flip the paper and repeat on the other side. Wings should be even and sharp.
Form the head by folding one narrow tip downwards. Adjust the angle to create a small beak. For the tail, fold the opposite tip upward or downward. The tail and head should balance each other.
Final adjustments include pulling the wings gently to open them. Make sure the bird can stand or glide well. Press all creases firmly. Small tweaks improve flying and appearance.
Tips For A Perfect Bird
Precise creasingis key for a clean origami flying bird. Sharp folds keep the bird balanced and neat. Use your fingernail or a flat tool to press down each crease. This makes the paper hold its shape better.
Proper paper sizematters a lot. A square paper about 6 to 8 inches works best. Too small, and it’s hard to fold; too big, and the bird may not fly well.
Adding detailsbrings life to the bird. Fold small parts like the wings and tail carefully. You can also shape the head by making tiny folds. These details help the bird look more real and fly smoother.
Flying Techniques
Hold the origami bird gently by its body, not the wings. This helps keep the shape intact. Use your thumb and forefinger to grip it lightly. Avoid squeezing too hard, or the paper may bend.
Throw the bird with a smooth, gentle motion. Aim slightly upward for a longer flight. Flick your wrist just a little to give it some lift. Too much force can make it dive quickly.
| Flight Issue | Cause | Fix |
|---|---|---|
| Bird dives quickly | Throwing too hard or nose down | Throw softer; tilt nose slightly up |
| Bird flips over | Uneven wing folds | Adjust wings evenly |
| Bird stalls and drops | Not enough wrist flick | Use gentle wrist flick to add lift |
Creative Variations
Choosing bright and colorful papermakes the origami bird look lively. Patterns like stripes or dots add fun and style. Use paper with different textures for a unique feel.
Try folding birds like cranes, swans, or doves. Each has a special shape and charm. Small changes in folds create many different bird designs.
- Use bold colors for a striking look.
- Mix plain and patterned papers for contrast.
- Try origami paper with floral or geometric prints.
- Explore birds with spread wings or folded wings.

Credit: www.youtube.com
Frequently Asked Questions
What Materials Do I Need To Make An Origami Flying Bird?
You only need a square sheet of paper. No glue or scissors are required.
How Long Does It Take To Fold An Origami Flying Bird?
It usually takes about 10 to 15 minutes for beginners to fold one.
Can Children Easily Make An Origami Flying Bird?
Yes, with simple steps and some practice, children can make it easily.
Conclusion
Making an origami flying bird is fun and simple. You only need paper and some patience. Each fold brings your bird closer to flying. Practice helps improve your folding skills. Try different paper sizes and colors for variety. Share your creations with friends or family.
Enjoy the calm and focus origami brings. Keep folding and see how high your bird can fly!