Have you ever wanted to capture the delicate beauty of a hummingbird on paper? Drawing these tiny, vibrant birds can seem tricky, but with the right steps, you can create stunning artwork that brings them to life.
Whether you’re a beginner or just looking to improve your skills, this guide will help you unlock your creativity and draw hummingbirds with confidence. Ready to discover how simple it can be? Let’s dive in and make your hummingbird drawings soar!
Materials Needed
Basic drawing supplies include pencils, erasers, and drawing paper. A set of pencils with different hardness levels helps create light and dark lines. Erasers are useful to correct mistakes and clean up sketches. Good-quality drawing paper makes the process smooth and enjoyable.
Optional coloring tools add life to your hummingbird drawings. Colored pencils, markers, or watercolors work well. Choose colors like green, blue, and red to match the hummingbird’s natural look. A small brush is helpful for blending colors smoothly. These tools help make your drawings bright and fun.
Choosing A Hummingbird Pose
Choosing a hummingbird poseshapes your drawing style. It helps show the bird’s energy and character.
Flying positionsoften capture motion. Wings can be spread wide or tucked in. The body may lean forward or hover upright. These poses show the bird’s speed and grace. Use curved lines to show wing motion.
Perched posesshow calm and detail. The bird sits on a branch or flower. Wings fold neatly. This pose lets you focus on feathers and tiny features. It feels peaceful and still.
- Flying: wings open, body tilted, sense of movement
- Hovering: wings blurred, body upright, energy in air
- Perched: wings closed, sitting still, detail on feathers
Sketching The Basic Shape
Begin by drawing simple shapes to form the hummingbird’s body and head. Use light lines to outline the basic form before adding details. This helps create a clear structure for your drawing.
Drawing The Body Outline
Start by drawing a small oval for the body. Make sure the shape is narrow and elongated. This will be the base of the hummingbird’s body. Next, draw a curved line at the top of the oval. This line will form the back of the bird. Ensure the curve is gentle and smooth.
Adding The Head And Beak
Attach a small circle to the top of the oval. This circle represents the head. Draw a thin triangle extending from the circle. This triangle will be the beak. Be sure the triangle is pointed and slightly curved downwards.

Credit: www.youtube.com
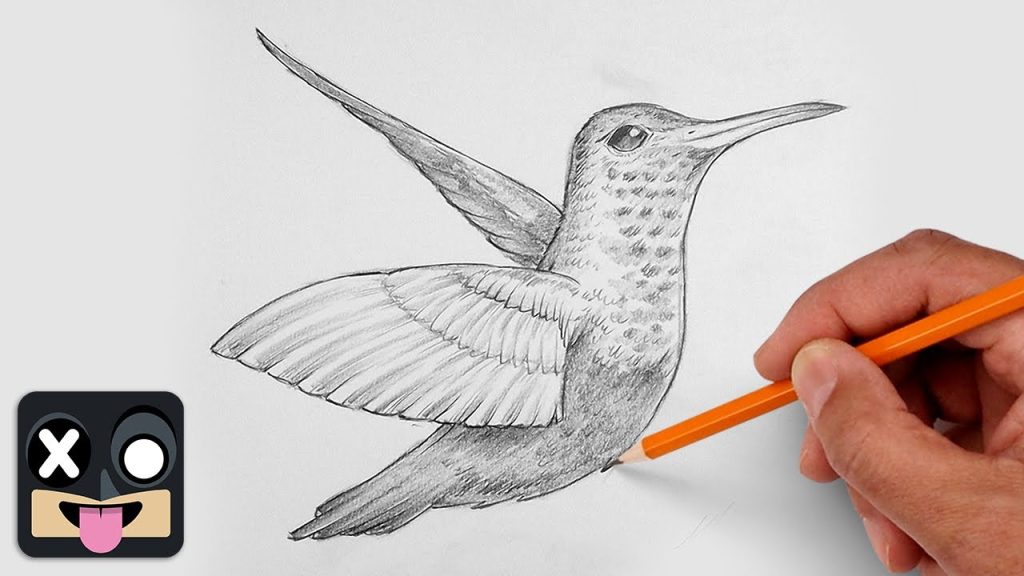
Detailing The Wings And Tail
The wing feathersof hummingbirds have a special pattern. They are layered to help with fast flight. The feathers near the body are shorter and softer. The ones at the edge are longer and stronger. These long feathers help the bird move quickly and change direction easily.
Each feather has a thin shaft with soft barbs on the sides. These barbs overlap to make a smooth surface. This helps the bird cut through the air without noise.
| Type of Feather | Location | Function |
|---|---|---|
| Primary Feathers | Outer wing | Powerful strokes for flight speed |
| Secondary Feathers | Middle wing | Lift and gliding |
| Coverts | Base of wing | Protect and smooth airflow |
The tail feathersspread out like a fan. They help the hummingbird steer and balance. The center tail feathers are usually longer. The feathers get shorter toward the edges. This shape helps with quick turns and stops.
Enhancing Facial Features
Eyesgive the hummingbird its lively look. Draw them big enough to show shine and life.
Use a small white spot inside the eye for a sparkle effect. This makes the bird appear alert.
Expressioncomes from the angle and size of the eyes. Slightly tilt them for a curious or gentle look.
Beak detailsare key for realism. Hummingbirds have long, thin beaks to reach flowers.
- Start with a smooth, slightly curved line.
- Make the tip sharp but not too pointy.
- Draw a small line to separate upper and lower beak parts.
- Keep the beak thin to show delicacy.
Soft shading near the beak base adds depth and shape. Use light strokes for subtle detail.
Adding Texture And Patterns
Feather patterns give a hummingbird its unique look. Use short, thin lines to show the tiny feathers. Draw layers of feathers overlapping each other. Vary the direction and length of lines to make the feathers look natural. Some areas have small, round feathers, while others have long, sharp ones. Patterns help show the bird’s shape and texture.
Shading adds depth and makes the drawing more real. Use light strokes to show soft feathers. Darker shading shows shadows under wings and body. Blend the shading gently to avoid harsh lines. Shade where the light hits less, like under the belly or behind the wings. This contrast gives the bird a 3D look.
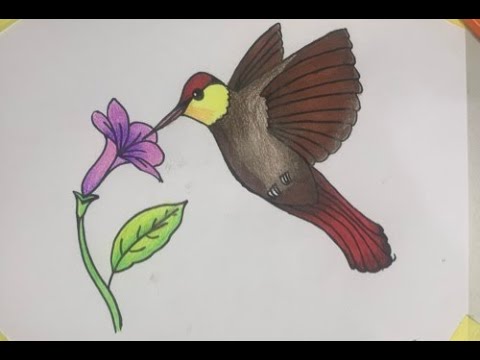
Coloring Your Hummingbird
Choosing the right colorsmakes your hummingbird look lively. Use bright greens, blues, and redsto show the bird’s natural beauty. Soft pastels work well for a gentle look. Try to pick colors that blend nicely together.
Layering colorsadds depth and life. Start with a light base color. Then, gently add darker shades to the edges and shadows. This gives the bird a 3D effect. Use small strokes to blend colors softly. Adding highlights with white or light colorscan make feathers shine.
Credit: www.youtube.com
Final Touches And Highlights
Carefully add light strokes to highlight feathers and wings. Use soft shading to bring your hummingbird drawing to life. Small details make a big difference.
Adding Light Reflections
Light reflectionsbring your hummingbird drawing to life. Use a white pencil or gel pen to add tiny bright spots on the eyes and feathers. These highlights create a shiny and wet look. Focus on areas where light naturally hits, like the top of the head and wing edges. Keep reflections small and subtle to avoid overpowering the drawing.
Refining Details
Sharpen the edges of the feathers with a fine pencil or pen. Add tiny lines to show texture and softness. Darken the shadows under the wings and belly to give depth. Erase any extra marks carefully to keep the drawing clean. Small, careful touches improve the realismand make your hummingbird stand out.
Common Mistakes To Avoid
Avoid drawing the hummingbird too stiff or ignoring its natural curves. Missing details like wing shape and beak size can make the bird look less real. Focus on smooth lines and correct proportions for a lifelike sketch.
Proportion Errors
Hummingbirdshave small bodies and thin beaks. Drawing the body too big or the beak too short makes the bird look wrong. The wings should be slim and long, not wide and thick. Eyes must be small and round. Pay close attention to the size of each part to keep the proportionsright.
Overworking The Drawing
Too many linescan make the drawing look messy. Adding too much detail can hide the shape of the bird. Use light, simple strokes first. Stop adding details once the shape is clear. Less is often better for a clean and neat drawing.

Credit: www.youtube.com
Tips For Practice And Improvement
Reference imageshelp see the bird’s details. Study its colors and shapes. Notice the feathers and beak. Look at how it moves. Try drawing it from different angles. This practice helps capture the bird’s essence. Keep a collection of imagesfor inspiration. Use online resources or books. Drawing from real images improves skills. It makes the drawing look more real. Use references to find new techniques.
Draw dailyto improve skills. Sketching every day builds confidence. Find a quiet spot to draw. Use a pencil and paper. Start with quick sketches. Then add details. Focus on the bird’s eyes and wings. Practice makes perfect. Try drawing for 10 minutes each day. Over time, you will see progress. Keep your drawings in a notebook. Look back to see improvements. Enjoy the drawing process.
Frequently Asked Questions
What Materials Do I Need To Draw Hummingbirds?
You need pencils, erasers, paper, and colored pencils or markers for drawing hummingbirds.
How Do I Draw A Hummingbird’s Wings Accurately?
Start with light strokes to sketch wing shapes, then add feather details step-by-step.
What Are Simple Steps To Draw A Hummingbird’s Body?
Draw a small oval for the body, a circle for the head, and connect with smooth lines.
Conclusion
Drawing hummingbirds can be fun and relaxing. Start with simple shapes and add details step by step. Practice often to improve your skills and confidence. Watch real hummingbirds or photos for ideas. Use light lines first, then darken when you feel ready.
Enjoy the process, not just the result. Soon, your hummingbird drawings will look lively and beautiful. Keep drawing, and don’t worry about mistakes. Every sketch helps you learn and grow. Have patience, and let your creativity flow freely.