Do you want to learn how to draw a mockingbird easily, even if you’ve never picked up a pencil before? You’re in the right place.
This simple guide will show you step-by-step how to create a beautiful mockingbird drawing without feeling overwhelmed. By the end, you’ll have a drawing you’re proud of—and the confidence to try more bird sketches. Ready to surprise yourself with your own art?
Let’s get started!
Materials Needed
- Pencil:A soft pencil like 2B works best for sketching.
- Eraser:A clean eraser helps fix mistakes easily.
- Paper:Use plain white paper or a sketchbook page.
- Sharpener:Keep your pencil sharp for fine details.
- Colored Pencils or Markers:Optional, for adding color to your drawing.
- Ruler:Useful for drawing straight lines if needed.
These materials are simple and easy to find. They help make drawing smooth and fun. Start with light pencil lines, so you can change them if needed.
Basic Shapes For Mockingbird
Start by drawing simple basic shapesto form the mockingbird’s body. Use an ovalfor the body and a smaller circlefor the head. Connect these shapes with a short neck line. For the beak, draw a small trianglepointing forward.
The wings can be made with two curved shapeson each side of the body. Use a long ovalfor the tail feathers. Keep the shapes light and easy to change.
- Oval for the body
- Circle for the head
- Triangle for the beak
- Curved shapes for wings
- Long oval for tail feathers
These shapes help create a simple outline. They make drawing a mockingbird easy and fun.
Sketching The Body Outline
Begin with a light pencil to draw the outline. Start with a simple oval shape for the mockingbird’s body. This helps in forming the bird’s main structure. Next, sketch a smaller circle for the head. Connect the head and body with a gentle curve.
Draw a line from the body for the tail. Make sure the tail is long and slightly curved. Add two lines for the legs underneath the body. Keep them short and simple for now.
Use a curved line to form the wings. They should start from the top of the oval and curve downwards. Ensure they are slightly larger than the body. This gives the bird a natural look.
Drawing The Head And Beak
Start by drawing a small oval for the mockingbird’s head. Make it slightly tilted to give a natural look. Next, sketch a pointed beakextending from the front of the oval. The beak should be sharp but not too long.
Use light lines to shape the beak with two parts: upper and lower. The upper part is slightly curved, while the lower part is straighter. Connect the beak smoothly to the head.
- Keep the head shape simple and round.
- Draw the beak with two parts for realism.
- Use soft lines for easy correction.
- Make the beak sharp but balanced.
Adding Wings And Tail Feathers
Start by drawing two curved lines for the wings. These lines should stretch out from the bird’s body. Add small, soft curves along the edges to show feathers. Make the wings look light and slightly spread.
For the tail feathers, draw a fan shape at the back. Use straight lines that spread out from a single point. Vary the length of each line to make the tail look natural. Add short, curved lines on each feather for texture.
- Keep wing lines smooth and flowing.
- Draw feathers using small curves and lines.
- Tail feathers should spread out evenly.
- Use simple shapes to keep it easy.

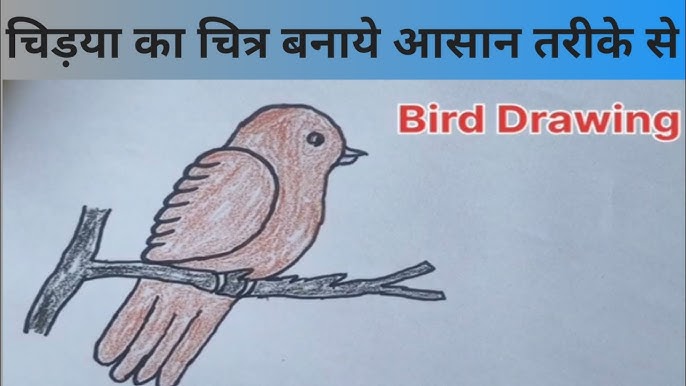
Credit: www.youtube.com
Detailing The Eyes And Feathers
Start with a small circle for the eye. Draw a tiny pupilinside. Leave a little white spot to show light reflection. This makes the eye look alive.
Use short, soft lines around the eye. These lines show the feathersnear the eye. Draw them in curved shapesto follow the bird’s head.
For the feathers on the body, use longer, overlapping lines. These lines should be curved and smooth. They show how feathers lie on the bird’s body.
- Draw feathers near the wing edge with thin, pointed lines.
- Use layered linesto show feather texture.
- Keep lines light and softto add depth.
Inking The Drawing
Use a fine-tip pen or marker for clear lines. Trace over the pencil sketch carefully. Keep your hand steady to avoid wobbly lines. Use short strokes for feathers and texture. Thicker lines can show the bird’s outline. Thin lines work well for details like eyes and beak. Wait for the ink to dry before erasing pencil marks. This prevents smudging. Ink adds a bold and clean look to your drawing. Let your lines vary in thickness for a natural feel.

Credit: www.youtube.com
Shading And Coloring Tips
Use soft pencilslike 2B or 4B for gentle shading. Light pressure creates smooth tones. Darker areas need more pressure or a softer pencil.
Shade in the direction of the bird’s feathers. This adds realistic texture. Blend edges softly with a blending stump or your finger for smooth transitions.
- Start with light gray tones for the body.
- Use darker grays and blacks for wing and tail feathers.
- Leave some white spots for highlights on the feathers.
For coloring, choose natural colorslike browns, grays, and light blues. Use colored pencils or light watercolors. Layer colors for depth but keep it soft.
Common Mistakes To Avoid
Many beginners make the mistake of drawing the bird’s body too big. This makes the bird look unnaturaland clumsy. The body should be small and slimto match a mockingbird’s shape.
Another common error is skipping the tail feathersor drawing them too short. The tail is long and pointed, so it must be clear and visible.
Some forget to add the bird’s eye details. The eyes should be round and bright. Without this, the bird looks lifeless.
- Avoid making the beak too thick or too short.
- Don’t draw wings flat; add some feather curves.
- Watch out for uneven legs and feet; keep them thin and straight.
- Do not fill the whole page; leave some space around the bird.
Practice Exercises
Begin with basic shapes. Draw circles for the body and head. Use triangles for the beak. This helps build the bird’s outline. Practice these shapes daily.
Combine shapes to form a bird. Connect the circles and triangles. Draw lines for wings and tail. Keep lines smooth and light. Adjust as needed.
Add eyes and feathers. Use small circles for eyes. Draw lines for feathers. Detail the bird’s legs and claws. Make each feature clear.
Use shading for depth. Darken areas like wings and tail. Lighten the chest and head. Shading shows light and shadow. Practice shading regularly.
Review your drawing. Make changes as needed. Add more details for realism. Practice often for improvement.

Credit: www.youtube.com
Frequently Asked Questions
How Do I Start Drawing A Mockingbird Easily?
Begin with simple shapes like circles and ovals to outline the body and head.
What Basic Tools Do I Need For Drawing A Mockingbird?
Use a pencil, eraser, paper, and colored pencils or markers for details.
How Can I Add Details To Make The Mockingbird Look Real?
Focus on feathers, eyes, and beak with light, short strokes and shading.
Conclusion
Drawing a mockingbird can be simple and fun. Follow each step slowly and carefully. Practice helps you improve your skills every time. Use light pencil strokes to fix mistakes easily. Enjoy the process, not just the result. Soon, you will create your own beautiful bird drawing.
Keep practicing, and your art will grow better. Drawing is a great way to relax and express yourself. Try different styles and colors to make it unique. Remember, every artist starts with simple steps. Keep drawing and have fun!