Have you ever wanted to draw a hummingbird but didn’t know where to start? You’re in the right place!
Drawing a hummingbird can be fun and easy, especially when you break it down into simple steps. Whether you’re a kid or helping one learn, this guide will show you exactly how to create a beautiful hummingbird drawing. By the end, you’ll feel proud of your artwork and excited to try more drawings.
Ready to bring this tiny, colorful bird to life on paper? Let’s get started!
Materials Needed
To draw a hummingbird, gather these basic materials. Use a pencilfor sketching the shape. An eraserhelps fix mistakes easily. Choose colored pencils or crayonsto color your hummingbird. Have a sharpenerready to keep your pencils sharp. Use a drawing paperthat is smooth and clean. A black markercan outline the drawing for a bold look. These simple tools make drawing fun and easy.
Basic Shapes To Start
Start by drawing a small oval for the hummingbird’s head. Next, add a larger oval tilted slightly for the body. Connect the head and body with a short, curved line for the neck.
Use a thin, pointed shape extending from the head for the beak. Draw two small circles inside the head oval for the eyes. Sketch a pair of long, thin wingsusing curved shapes on each side of the body.
For the tail feathers, draw several thin, pointed shapes fanning out from the back of the body. Keep the shapes simple and clear to make the hummingbird easy to draw.
Adding Details
Start by drawing small lines on the wings to show feathers. Use short, curved strokes for a soft look. Add tiny dots near the eye for extra detail. Sketch the beak with a smooth, thin line. Draw the tail feathers with gentle curves pointing outward. Shade the body lightly to show the bird’s shape. Darken the eye to make it stand out. Use a pencil first; then trace with a black pen for clearer lines. Erase any extra marks to keep the drawing neat. These details make the hummingbird look lively and real.

Credit: www.youtube.com
Coloring Your Hummingbird
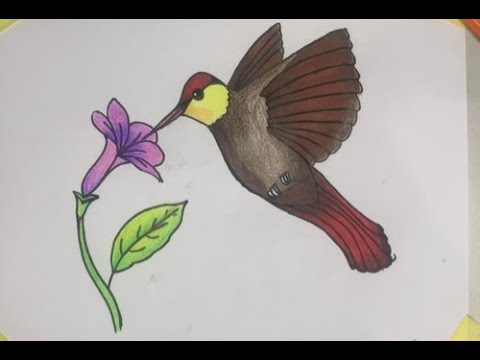
Choose bright colors for your hummingbird. Green, blue, and red are great. These colors make your bird look real. Use colored pencils or crayons. Paint can also be fun. Start with the wings and tail. Make them colorful and bright. Then, color the body. Pick a nice shade for it. The head should be bright too. Make sure the beak is black or dark brown. This helps it stand out. Add some sparkle to the eyes. This gives life to your drawing. Remember, hummingbirds are colorful creatures.
Tips For Young Artists
Start with a small oval shape for the hummingbird’s body. Draw a tiny circle for the headon one end of the oval. Add a long, thin trianglefor the beak. Use light pencil lines to make changes easy.
Sketch the wingsas curved lines coming from the body. Make the wings look like they are flapping fast. Draw small, thin lines to show feathers on the wings and tail.
Keep the shapes simple and clear. Use bright colorslike green, blue, and red for a fun look. Practice drawing the hummingbird many times to get better.
- Use soft pencil for easy erasing
- Keep shapes simple and clear
- Draw feathers with short, curved lines
- Color with bright, happy colors
- Practice often to improve

Credit: www.youtube.com

Credit: www.youtube.com
Frequently Asked Questions
How Can Kids Start Drawing A Hummingbird Easily?
Begin with simple shapes like circles and ovals to outline the body and wings.
What Materials Are Best For Kids To Draw Hummingbirds?
Use pencils, erasers, and colored pencils or crayons for easy drawing and coloring.
How Long Does It Take Kids To Draw A Hummingbird?
Most kids can finish a basic hummingbird drawing in 15 to 30 minutes.
Conclusion
Drawing a hummingbird can be fun and simple for kids. Step by step, children learn shapes and colors. This activity helps improve their focus and creativity. Practice makes their drawings better each time. Encourage kids to try different poses and styles.
Art builds confidence and brings joy. Keep the process light and enjoyable for best results. Happy drawing!