Are your Rainbird sprinkler heads not watering your lawn the way you want? Maybe some areas are too dry while others are soaking wet.
You don’t have to live with uneven watering that wastes water and harms your plants. Learning how to adjust your Rainbird sprinkler heads is easier than you think—and it can make a big difference in your yard’s health and beauty.
In this guide, you’ll discover simple steps to get your sprinklers working just right. Keep reading, and you’ll soon have a perfectly watered lawn without any guesswork.
Tools Needed
To adjust Rainbird sprinkler heads, gather these basic tools. A flathead screwdriverhelps turn adjustment screws. A needle-nose plierscan grip small parts. A shovelis useful to dig around heads if needed. A spray pattern adjustment keyfits some Rainbird models. Keep a clean clothhandy to wipe dirt off. Having a water sourcenearby is important to test the spray. These simple tools make adjusting easier and faster.
Credit: www.angi.com
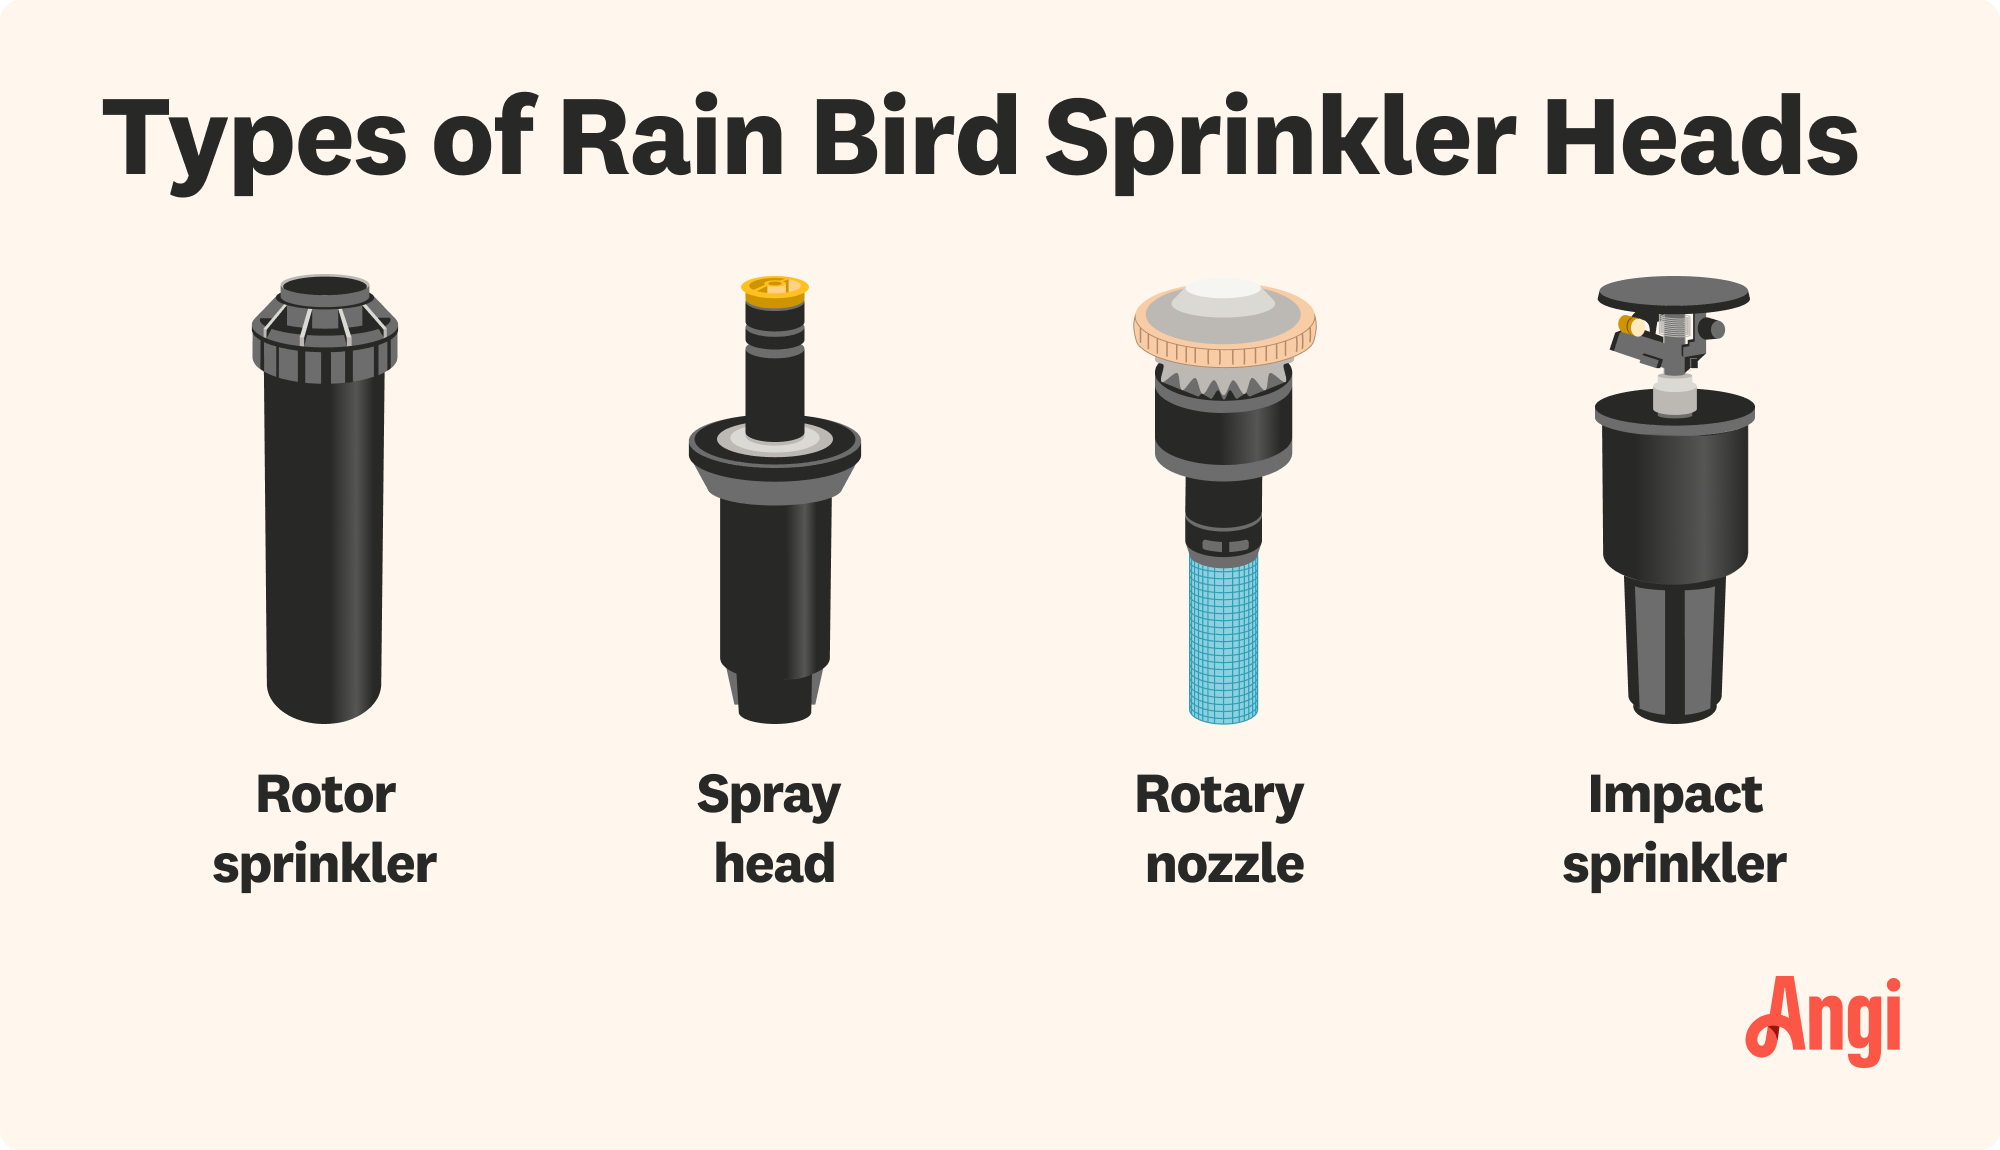
Locate Sprinkler Heads
Sprinkler heads are usually visible in your lawn or garden. They look like small, round devices that pop up when watering. Check near your plants, grass, or flower beds. Sometimes, they hide under leaves or dirt, so clear the area gently. Look for the brand name Rainbird on the sprinkler head. This helps confirm you found the right one. Make sure each sprinkler head can spin or spray water freely. If a sprinkler is broken or stuck, it might need fixing or replacing before adjusting. Knowing where all sprinkler heads are helps you water your garden evenly and save water.
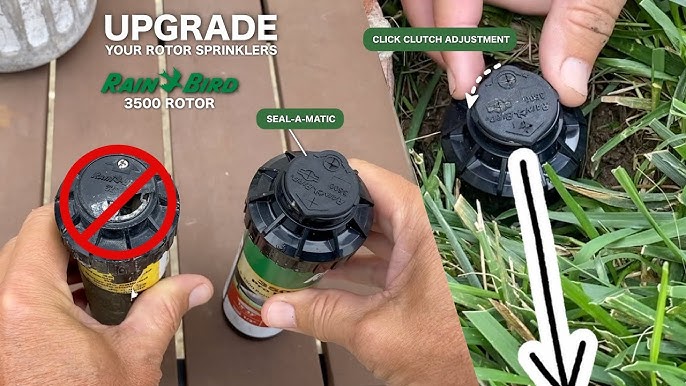
Adjust Spray Distance
Adjusting the spray distanceof Rainbird sprinkler heads helps water reach the right areas. Locate the screw on the topof the sprinkler head. Turn it clockwiseto reduce the spray distance and counterclockwiseto increase it. Make small turns and watch the water spray to avoid overwatering or dry spots.
Some models have a plastic capover the adjustment screw. Remove it carefully before turning the screw. Always check the sprinkler after adjustment to ensure it covers the desired area.

Credit: m.youtube.com
Change Spray Pattern
First, locate the adjustment screw on top of the sprinkler head. Turn the screw clockwise to decrease the spray range. This makes the water spray shorter. Turn it counterclockwise to increase the range. This makes the water spray longer. Always adjust the screw slowly. This helps prevent damage.
Next, check the spray direction. Hold the nozzle and twist gently. This changes the direction where water will spray. Make sure water goes where you need it. Test the sprinkler after adjusting. Ensure the pattern covers your garden well.
Important Tip:Use a screwdriver for adjustments. Avoid using your fingers. This keeps the screw safe from damage.
Test And Fine-tune
Check the sprinkler head spray pattern carefully. Adjust the angle to cover the needed area.
Use the adjustment screw to change the spray distance. Turn clockwise to reduce reach. Turn counterclockwise to increase it.
Watch for water hitting sidewalks or walls. Redirect spray to plants or grass only. This saves water and prevents damage.
Test each head one by one. Make small changes and then observe results. Fine-tuning ensures even watering.
- Remove debris from the nozzle before testing.
- Adjust spray arc to control side coverage.
- Ensure spray does not overlap too much with other heads.
- Check for leaks or broken parts.
- Repeat testing after each adjustment.

Credit: www.rainbird.com
Frequently Asked Questions
How Do I Adjust Rainbird Sprinkler Spray Distance?
Turn the adjustment screw on the sprinkler head clockwise to reduce distance, or counterclockwise to increase it.
How Can I Change The Spray Pattern On Rainbird Heads?
Rotate the collar around the sprinkler head to select a new spray pattern easily.
What Tools Do I Need To Adjust Rainbird Sprinklers?
Usually, a flathead screwdriver or your hands are enough for most sprinkler adjustments.
Conclusion
Adjusting Rainbird sprinkler heads keeps your lawn healthy and green. Check the spray direction and distance regularly. Small tweaks save water and prevent dry spots. Use a screwdriver to make simple changes. Test the spray after adjusting for best results.
Regular care helps your system work well longer. Keep an eye on your sprinklers each season. Simple steps make watering easier and more efficient. Your garden will thank you with lush, even growth. Stay consistent to enjoy a beautiful yard all year.