
Have you ever wanted to draw a bird but felt unsure where to start? You’re not alone.
Drawing can seem tricky, but it doesn’t have to be. With the right steps, you can create a beautiful bird sketch quickly and easily. In this guide, you’ll discover simple, clear instructions that anyone can follow—no special skills needed. By the end, you’ll have a bird drawing you’re proud of.
Ready to surprise yourself with what you can create? Let’s get started!
Materials Needed
Gather these simple materialsto start drawing a bird easily. A pencilhelps create soft lines. Use an eraserto fix mistakes. Choose a sharpenerto keep the pencil tip fine. Paper size can be any, but plain white paperworks best.
Colored pencils or markers can add colorafter drawing. A ruler helps with straight lines but is optional. Keep a small cup of water nearby if using watercolors.
- Pencil
- Eraser
- Sharpener
- Plain white paper
- Colored pencils or markers (optional)
- Ruler (optional)
- Water cup (for watercolors)
Basic Shapes And Guidelines
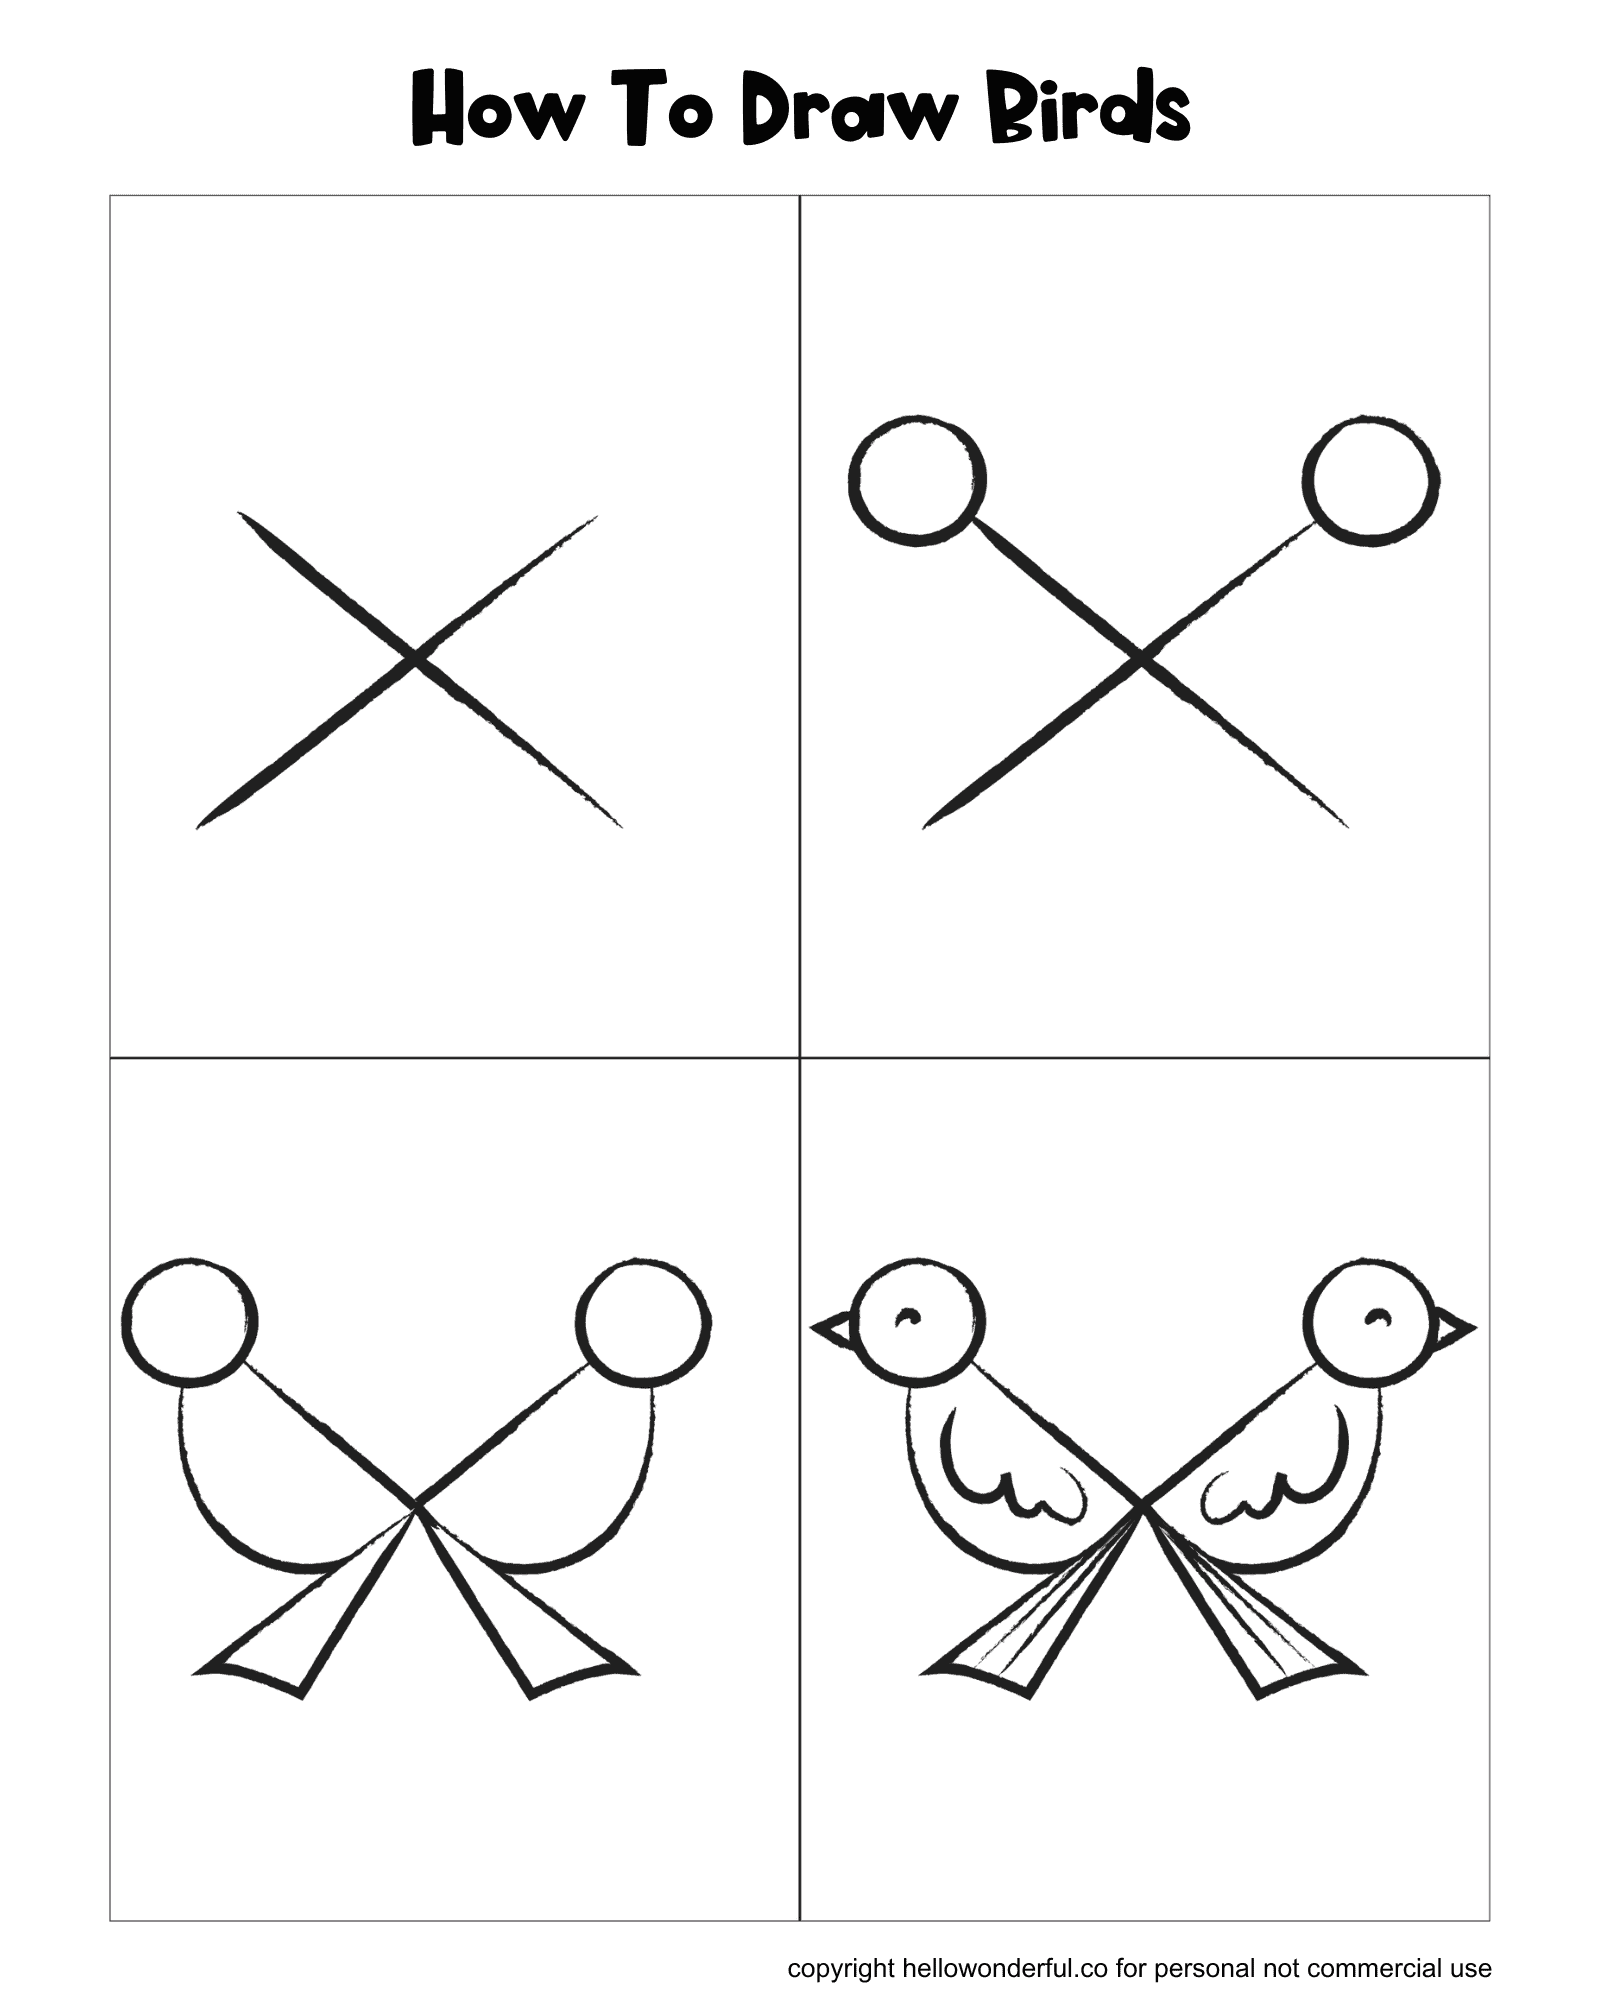
Start by drawing a small circle for the bird’s head. Below it, draw a larger oval shape for the body. These basic shapeshelp create the bird’s form.
Use light lines to connect the head and body. This will be the bird’s neck. Draw a guideline through the head circle to place the beak correctly.
Sketch a straight line from the body to show the bird’s tail direction. Add two small ovals on each side of the body for wings.
- Circle: Head
- Oval: Body
- Line: Neck and tail
- Small ovals: Wings
These shapes and lines act as a simple map. They help keep the drawing balanced and easy to follow.
Sketching The Bird’s Body
Begin with a small oval shape for the bird’s head. Draw a larger oval below it for the body. Connect these shapes smoothly with two curved lines to create the neck. Make sure the body is wider at the bottom to show the bird’s chest. Use light pencil strokes to keep the shapes soft.
Sketch a guideline through the body to help place the wings later. This line should curve gently from the bird’s head to the tail area. Keep the shapes simple and round. Avoid sharp angles at this stage to keep the bird looking natural.

Credit: www.facebook.com
Adding Details And Features
Start with the bird’s eyes. Draw them round and bright. Add small lines for feathers around the eyes. Next, focus on the beak. Shape it like a triangle. Make sure it looks sharp and strong.
Now, draw the wings. Use curved lines. They should look wide and open. Add details like feathers. Small lines will help. Then, sketch the tail. It should be long and graceful. Add a few lines to show feathers.
Finally, draw the legs. They should be thin and straight. Add tiny claws at the end. This makes the bird look real. Remember, details bring your bird to life. Practice helps you get better.
Finalizing And Coloring
Use a soft eraser to gently remove extra pencil lines. This makes your bird look neat and clear. Choose colors that match the bird you want to draw. Light colors work well for feathers.
Color the wings and body carefully. Use small strokes to show feather texture. Darker shades add depth and make the bird look real. Don’t forget the beak and eyes. A little shine in the eyes brings life.
- Start with light colors for a soft look.
- Add darker colors for shadows and details.
- Use a fine tip for small parts like eyes.
- Blend colors gently for smooth transitions.
Credit: www.hellowonderful.co

Credit: www.facebook.com
Frequently Asked Questions
What Materials Do I Need To Draw A Bird Easily?
Basic supplies like paper, pencil, eraser, and colored pencils work well for simple bird drawings.
How Long Does It Take To Draw A Bird Step By Step?
It usually takes 10 to 20 minutes, depending on your drawing speed and detail level.
Can Beginners Follow These Bird Drawing Steps Successfully?
Yes, the steps are clear and simple, perfect for beginners to practice and improve.
Conclusion
Drawing a bird can be simple and fun with these steps. Practice each part slowly and watch your skills grow. Remember, mistakes help you learn and improve. Keep trying, and soon your bird drawings will look great. Enjoy the process and express your creativity.
Drawing brings calm and joy to your day. Start with small steps, and you will see progress. Your bird sketches will become clearer and more detailed with time. Just keep drawing, and have fun with every line.